
and follow my directions. Lucky for me, our schedule this year allows for a 55 minute class period instead of a 39 minute period. This gives plenty of room for directive. So this year, I crossed my fingers and hoped for the best as I dove right into working with paints. Lucky for me, it was fabulous!!
 Painted pumpkins!! My audience breaks out into "wow's" as we blended colors while dropping paint onto wet paper only to discover the paint moves on its own without or brushes and muddles together. How sweet it is to see their eyes light up and their bodies wiggle in their seats in eager anticipation!
 |
| Mixing colors for the leaf :) |
We talked about riding on a hay ride to go pumpkin picking, we learned how to draw a pumpkin rounded with the curves for the bumps in place. We admired the fun twisty vines and talked about how pumpkin leaves can grow bigger than our face! After drawing our pumpkin and grass, we outlined white oil pastel over our pencil lines to do a resist with watercolors.

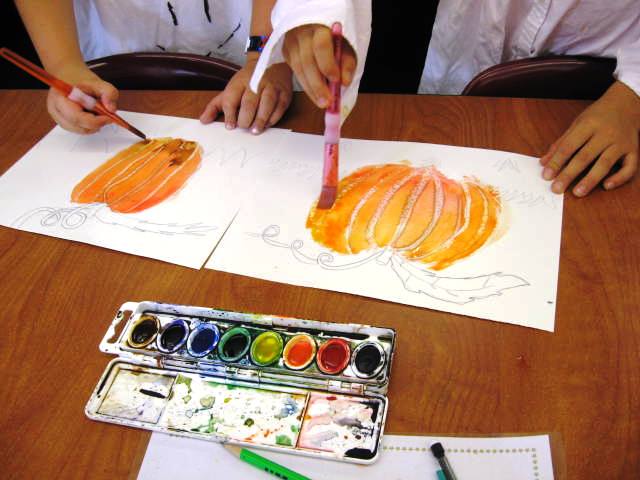

To make it "bumpy" we added a glue outline and mounted our art to colored paper for display!

These pumpkins are BEAUTIFUL! Now.. for some pumpkin pie...

Very nice! And with a 55 minute class time, you have a wonderful opportunity to get really into a project. Thanks for sharing.
ReplyDeleteThat's a HUGE difference between 39 and 55 minutes. You must be loving it! I have my kids for 50 minutes but whenever I have extra time, I try to get teachers to come even longer if they can. Last week I had a class that could stay for and hour and a half -- NOW THAT WAS HEAVEN!!!!!! Thanks for sharing your lovely pumpkins.
ReplyDeleteThank you both for your kind words! I do love the 55 minutes, even when we have shortened days now (early dismissal and whatnot) I feel like I have them for a good chunk of time- you can't go wrong! Let me tell you though- the production time is so productive! Ha! We've been flying through projects and meeting goals I thought we'd never get in depth on! I feel so lucky!
ReplyDeletehi there,
ReplyDeletesome how I ended up on your page and I am VERY thankful for that! What beautiful pumpkins!
I homeschool my kids and would love to do something like that with them.
Do you mind explaining a bit more about the process?
do you do wet water color painting first and then add the oil pastel for the outline?
many thanks, Inbal, Canada
I see you posted this two years ago! I'm very sorry that I disappeared on you. I got busy being a new mommy and wrapped up in my pregnancy! I hope you were able to enjoy doing this pumpkin project with your home schooled kiddies. Just in case someone else was interested too, I'll say that you can always look up you tube videos on water color resists to help you visualize how to do it. I would have the kids draw the picture, go over their pencil lines in oil pastel, and then use the watercolors. You can wet the paper before adding the paint or just add the paint, but the oil pastel should be on the paper before any water or paint hits the page. When you spread out the paints with water, you'll notice the paint bead up on top of the oil pastel or it will slide off to the side. That's how it "resists". I hope it worked out for you!
DeleteWhat a terrific activity. I was wondering if you could tell me a few more details. What type of paper did you use? Did you wet the paper, or was it simply wet through use of the water colour paints?
ReplyDeletethanks,
Andy
Hi Andy! I'm sorry I had disappeared on you. I'm sure you experimented and figured it all out. Just in case someone else is interested though, I tend to buy whatever is the best deal on watercolor paper in bulk for my classroom through School Specialty (Sax Arts & Crafts). I can't remember what I used that year I did that, but as long as it is decent quality it'll work out well.
DeleteI did have the students for large areas experiment with wetting a section and adding paint to that wet area. They would have the cutest reactions as they watched the paint color move and spread on its own as it soaked into the wet areas. That was another way I had them mix colors- drop two colors into a wet area and watch it move around combining on its own. For smaller sections they used the paint directly onto the dry paper.
I hope you enjoyed making pumpkins!